• DE
  • EN
    • +1 929-264-76 02
    • Request free audit
    • n8n-Shopware
  • Solution25 Logo Dark 1
  • Group 3
  • Shopware

    SUPPORT

    • Shopware Core Concepts
    • Who Uses Shopware?
    • Become a Good Shopware Partner
    • Shopware Hosting
    • Shopware Pre Go-Live Checklist
    • Why Shopware in 2025?

    MUST KNOW

    • B2B on Shopware
    • B2C on Shopware
    • Shopware Performance
    • Shopware Paas on Platform.sh
    • Shopware for the U.S Market
    • Shopware Seo Guide

    Start your secure migration with us.

    Solution25 6 Certified Advanced Developer
    Solution25 6 Certified Advanced Template Designer
    Solution25 6 Certified Solutions Specialist
    Solution25 6 Certified PaaS Specialist
    Migrate now!
  • Shopify

    SUPPORT

    • What is Shopify?
    • Who should use Shopify?
    • What can you do with Shopify?
    • How much does Shopify cost?
    • How do you choose your Shopify theme?

    MUST KNOW

    • Can you connect Amazon to Shopify?
    • Who Owns Shopify?
    • Shopify Disadvantages
    • Benefits of Shopify

    Migrate your store with expert Shopify support.

    Group 1321315317 Certified Advanced Developer
    Solution25 6 Certified Advanced Template Designer
    Solution25 6 Certified Solutions Specialist
    Solution25 6 Certified PaaS Specialist
    Free consultation!

    SUPPORT

    • What is Shopify?
    • Who should use Shopify?
    • What can you do with Shopify?
    • How much does Shopify cost?
    • How do you choose your Shopify theme?

    MUST KNOW

    • Can you connect Amazon to Shopify?
    • Who Owns Shopify?
    • Shopify Disadvantages
    • Benefits of Shopify

    Migrate your store with expert Shopify support.

    Group 1321315317 Certified Advanced Developer
    Solution25 6 Certified Advanced Template Designer
    Solution25 6 Certified Solutions Specialist
    Solution25 6 Certified PaaS Specialist
    Free consultation!
  • Integrations

    Integrations

    BlueSnap Logo

    Shopware 6 Blue Snap

    Cybersource Icon

    Shopware 6 Cybersource

    Solution25 Icon

    Shopware 6 Abandoned Cart Saver

    Solution25 Icon

    Shopware 6 Store Credit

    Optimizely Icon

    Shopware 5 Optimizely Campaign

    Optimizely Icon

    Shopware 6 Optimizely Campaign

    Paytrace Icon

    Shopware 6 PayTrace Payment

    Nmi Payment Icon

    Shopware 6 NMI Payment

    Maxmind Icon

    Shopware 6 MaxMind Fraud Prevention

    Solution25 Icon

    Shopware 6 Quotes & Customer-Specific Pricing

    Solution25 Icon

    Shopware 6 Subscription

    Listrak Icon

    Shopware 6 Listrak

    Solution25 Icon

    Shopware 6 Multi Channel

    Solution25 Icon

    Shopware 6 Partial Delivery

    Age Checker Icon

    Shopware 6 AgeChecker.net

    Pudo Point Icon 1

    Shopware 6 Pudo Point

    SUPPORT

    • Why API First Opens Doors?
    • Reduce the cost of ERP integrations
    • PyPal Payment Provider
    • Klaviyo Integration Guide for Shopware 6
    • Klaviyo - Email Marketing Integration

    MUST KNOW

    • Reviews.io Integration Guide for Shopware 6
    • Hubspot - Integration for Shopware 6
    • Mailchimp - Email Marketing Integration
    • Google Analytics - Integration Guide
    • Integrate Zapier with Shopware 6

    Explore secure integrations now.

    Solution25 6 Certified Advanced Developer
    Solution25 6 Certified Advanced Template Designer
    Solution25 6 Certified Solutions Specialist
    Solution25 6 Certified PaaS Specialist
    Free consultation
  • Migration

    Migration

    Shopware5 To Shopware6

    Shopware 5 to Shopware 6

    Shopify To Shopware6

    Shopify to Shopware 6

    Magento To Shopware6

    Magento to Shopware 6

    Oxid To Shopware6

    Oxid to Shopware 6

    SUPPORT

    • Migrations
    • Prep for Shopware Platform Migrations
    • Our Shopware Process
    • Painful Shopware 6 Migrations if Done Wrong

    MUST KNOW

    • Shopware Prep: Historical Order Data
    • Shopware Data Ready
    • Shopware Content Migrations
    • SEO Considerations in Platform Migrations

    Ready to migrate your shop?

    Solution25 6 Certified Advanced Developer
    Solution25 6 Certified Advanced Template Designer
    Solution25 6 Certified Solutions Specialist
    Solution25 6 Certified PaaS Specialist
    Migrate now!
  • Company

    Company

    • About Us
    • Events
    • Blogs
    • Careers
    Solution25 Company
  • Language: EN

    Select Language

    • DE
    • EN
  • Free consultation
  1. Home /
  2. Listrak
Github

Listrak

437436448 B0a01c49 1dcf 4a71 Bcb3 63b39e1d7d84
Share

Table of content

Free 15 min initial consultation directly with our experts.

Free consultation +49 421 438 1919–0
Share

Introduction

The Listrak plugin integrates your Shopware 6 store with Listrak’s marketing platform bringing advanced features like abandoned cart recovery, customer data sync, and storefront tracking to help you grow your business.

Key Features

1.Customer Data Sync
Automatically send customer registrations and newsletter signups to Listrak.
2.Order Data Sync
Push order information to Listrak for personalized post-purchase campaigns.
3.Product Data Sync
Push product information to Listrak for personalized post-purchase campaigns.
4.Admin Panel Integration
Manage API credentials and feature toggles directly from the Shopware admin panel.
5.Abandoned Cart Recovery
Capture cart data and sync it with Listrak for automated follow-up campaigns.
6.Transactional Mails
Send Transactional Mails via Listrak.

Compatibility

  • ✅ Shopware 6.6.x

Get Started
Installation & Activation
1.Download

Git

  • Clone the Plugin Repository:

  • Open your terminal and run the following command in your Shopware 6 custom plugins directory (usually located at custom/plugins/):

git clone https://github.com/solution25com/listrak-shopware-6-solution25.git

Packagist

composer require solution25/listrak

2.Install the Plugin in Shopware 6

  • Log in to your Shopware 6 Administration panel.

  • Navigate to Extensions > My Extensions.

  • Locate the newly cloned plugin and click Install.

3.Activate the Plugin

  • After installation, click Activate to enable the plugin.

  • In your Shopware Admin, go to Settings > System > Plugins.

  • Upload or install the “Listrak” plugin.

  • Once installed, toggle the plugin to activate it.

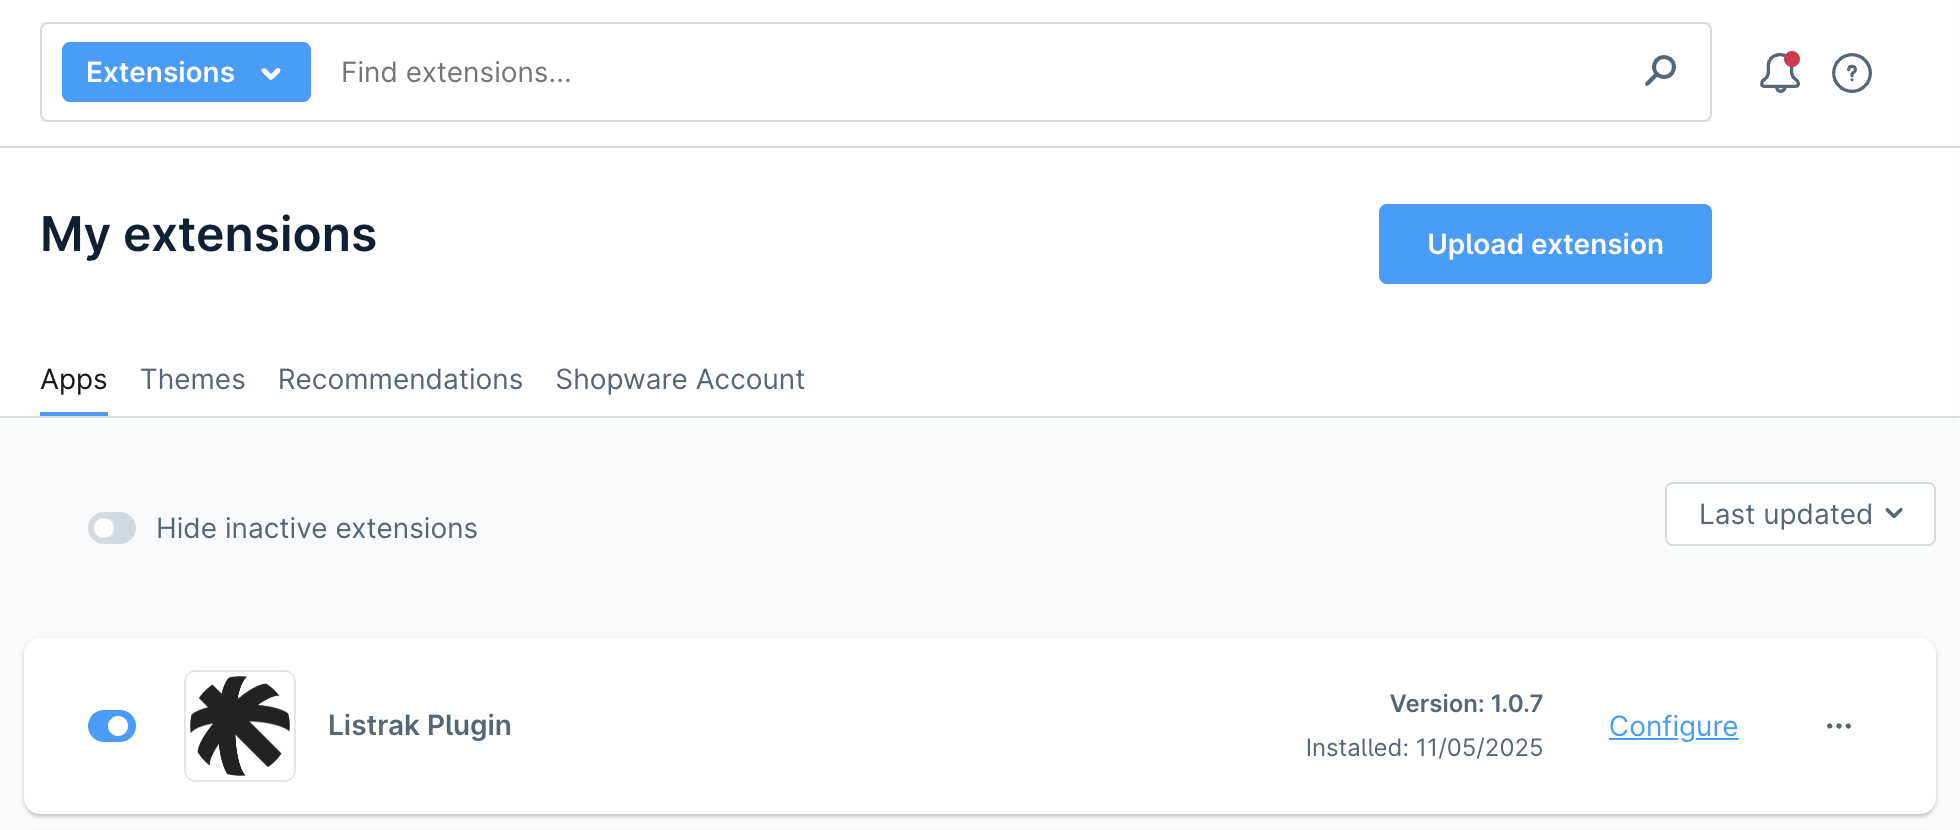
4.Verify Installation

  • After activation, you will see Listrak in the list of installed plugins.

  • The plugin name, version, and installation date should appear as shown in the screenshot below.

442821698 8f7ef694 4282 46aa 8ec6 Aa35045d16c8

Plugin Configuration

1.Access Plugin Settings

  • Go to Settings > System > Plugins.

  • Locate Listrak and click the three dots (...) icon or the plugin name to open its settings.

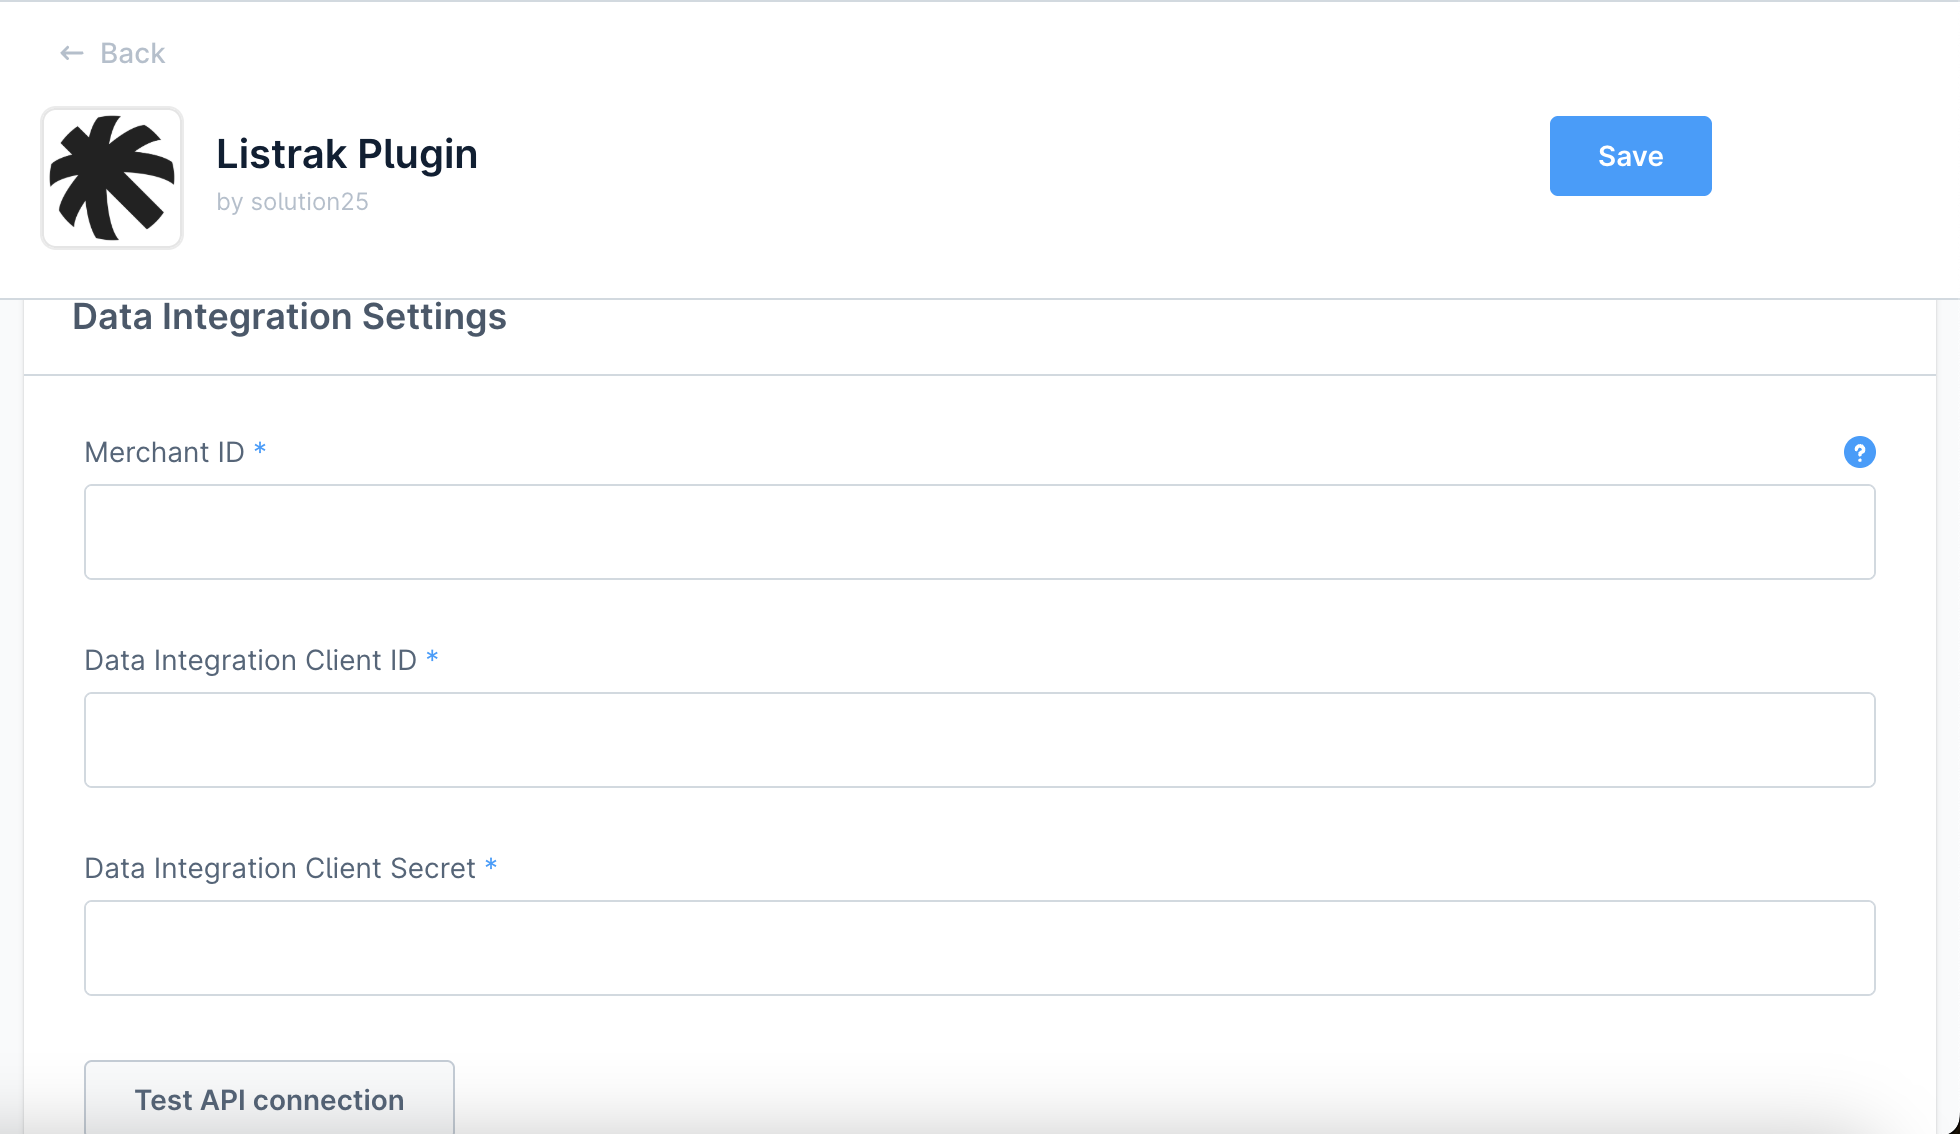
2.Data Integration Settings

Listrak Merchant ID
Enter the Merchant ID provided by Listrak.
Listrak Data Client ID
Enter the Client ID from your Listrak Data Integration.
Listrak Data Client Secret
Enter the Client Secret from your Listrak Data Integration.
Test API connection
Test Data API connection.

3.FTP Integration Settings

FTP Username

Enter the FTP Username from your Listrak FTP Integration.
FTP Password
Enter the FTP Password from your Listrak FTP Integration.
442821850 4ac4732c Da1d 4236 Aad0 2e76ffd530db

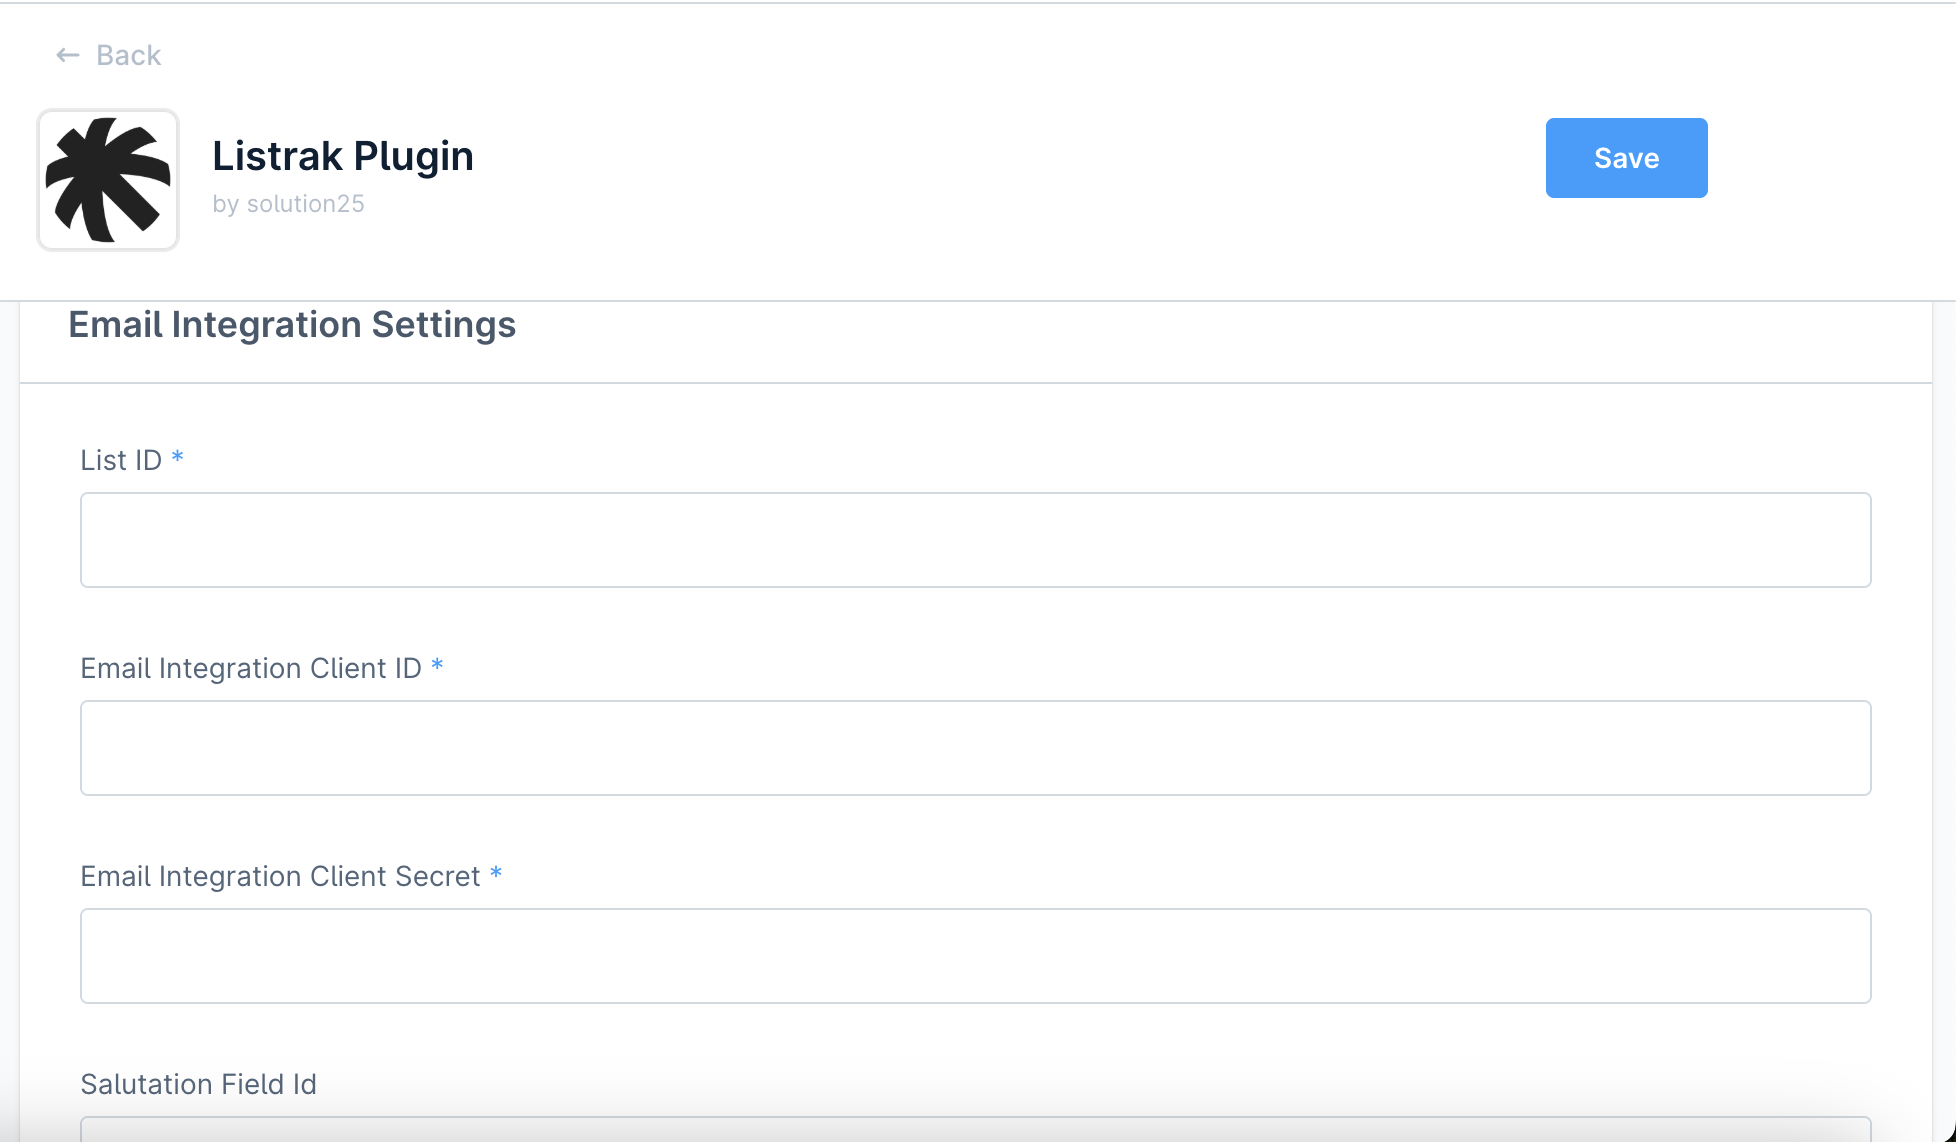
4.Email Integration Settings

Marketing List ID
Enter the List ID which you can find at Help & Support > API ID Information in the Listrak Admin.
Transactional List ID
Enter the List ID which you can find at Help & Support > API ID Information in the Listrak Admin.
Listrak Email Client ID
Enter the Client ID from your Listrak Email Integration.
Listrak Email Client Secret
Enter the Client Secret from your Listrak Email Integration.
Salutation Field Id
Optionally enter the Salutation field id from your Listrak Email Profile field, if it exists.
First Name Field Id
Optionally enter the first name field id from your Listrak Email Profile field, if it exists.
Last Name Field Id
Optionally enter the last name field id from your Listrak Email Profile field, if it exists.
Test API connection
Test Email API connection.
441230989 7b1dc3b6 572e 46d3 812b 85a15b070455

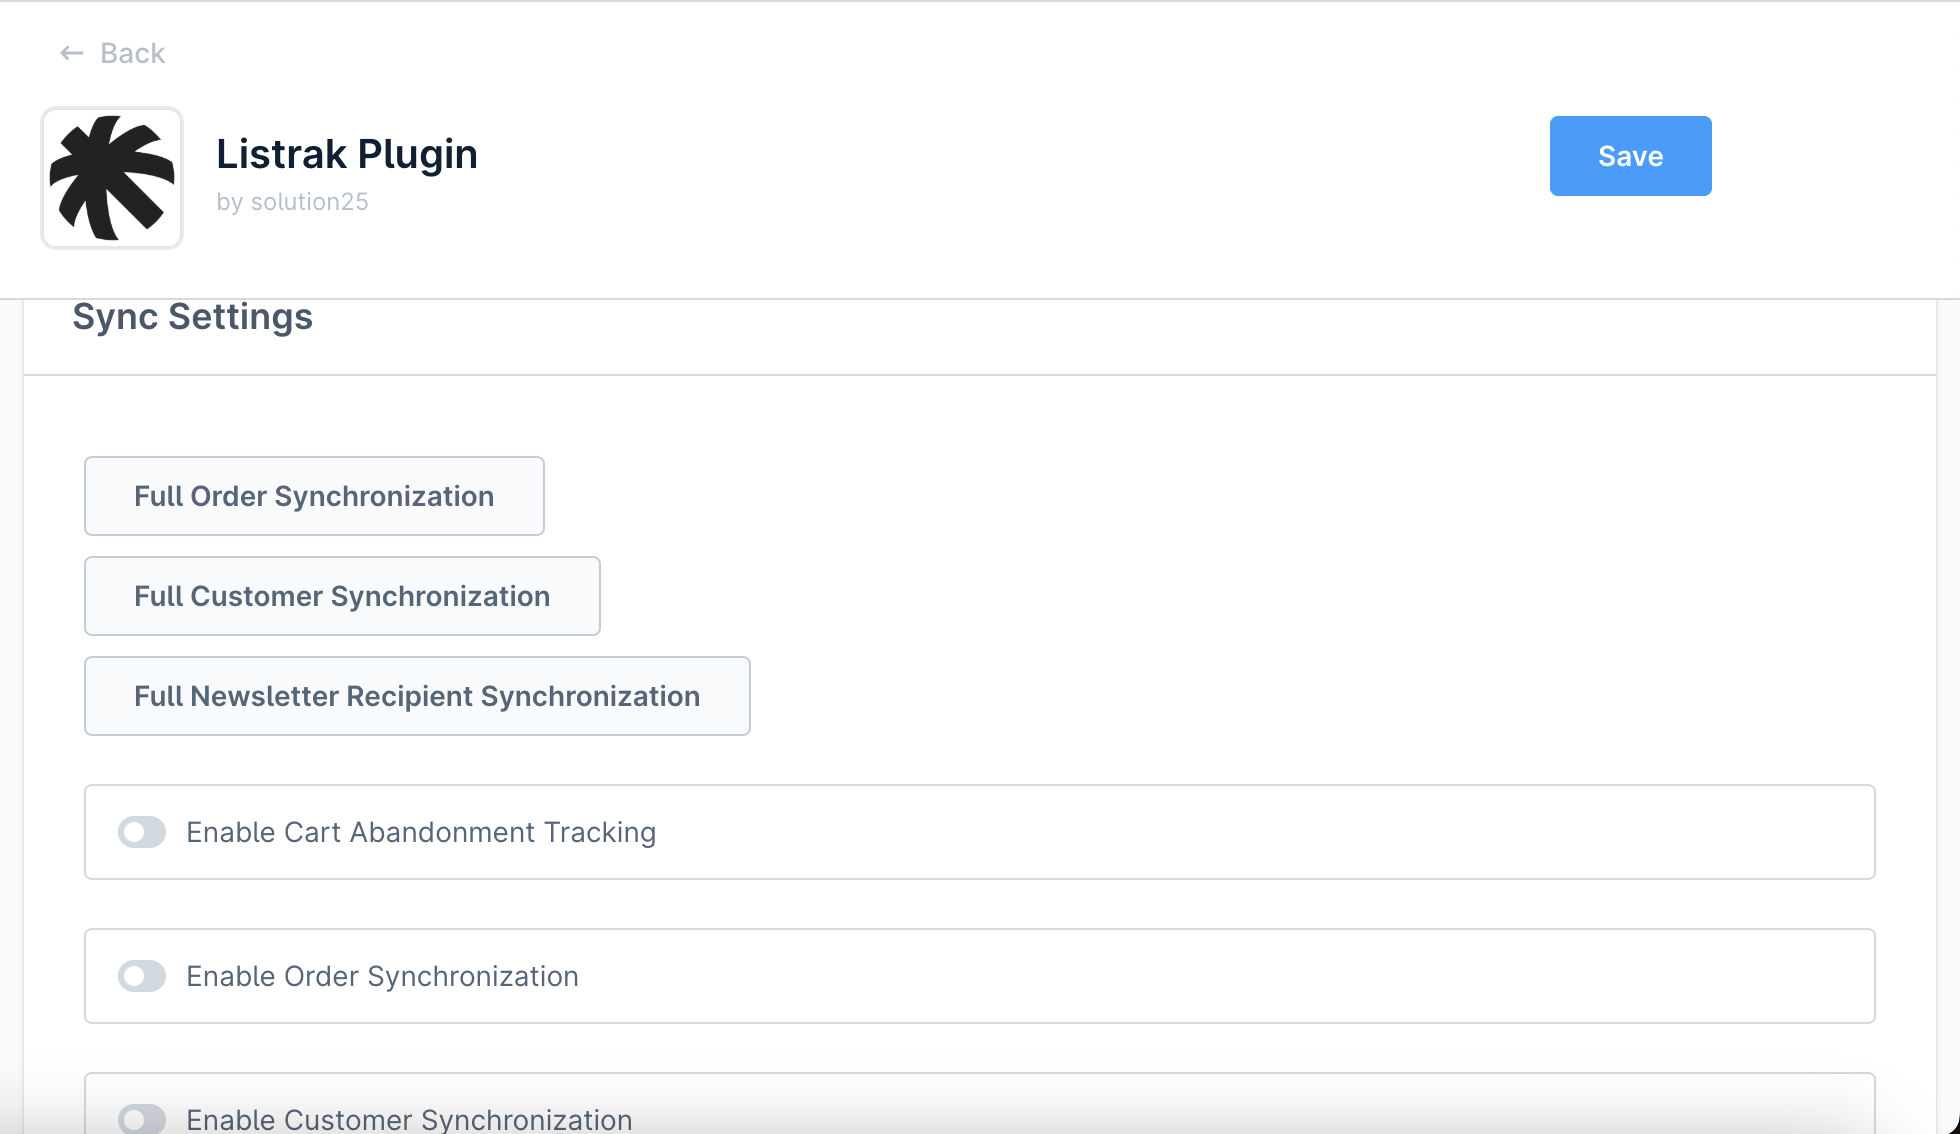
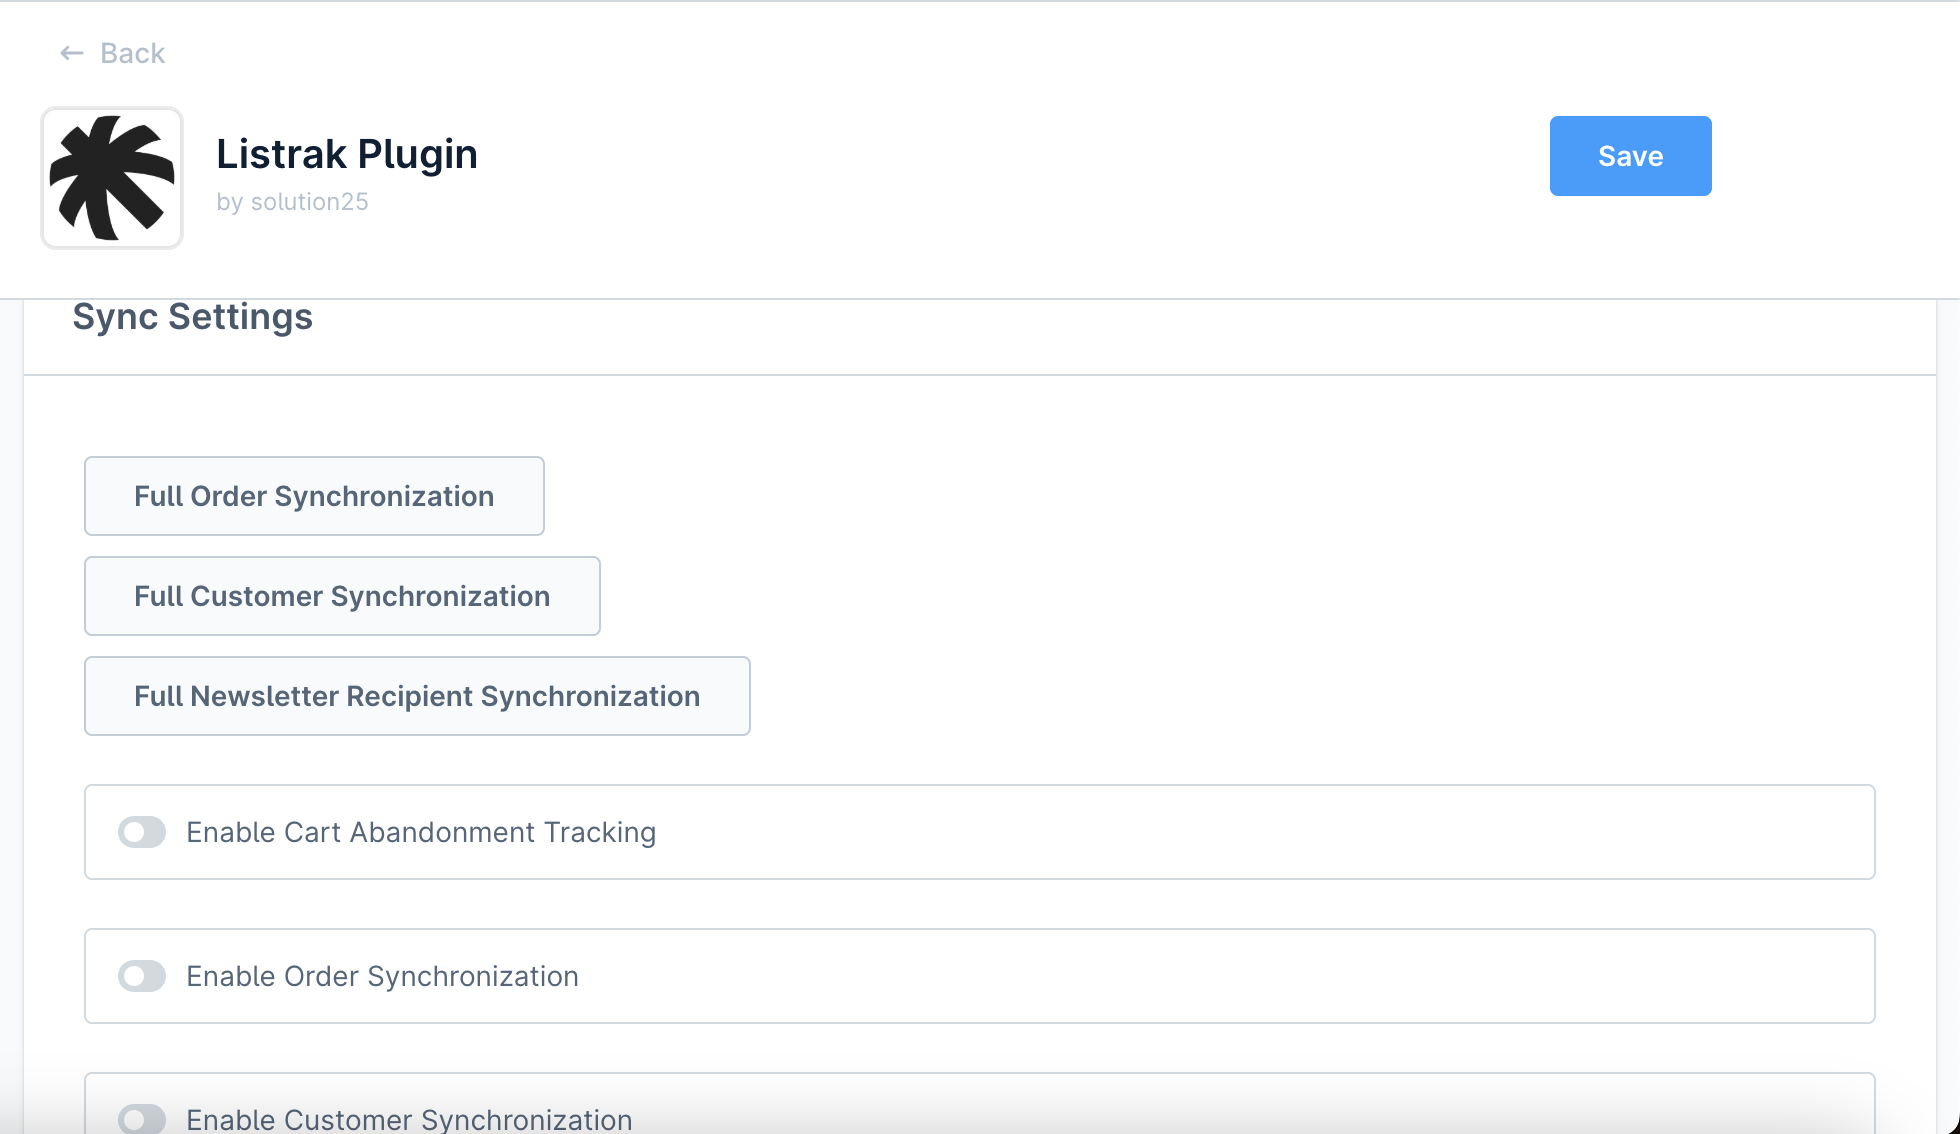
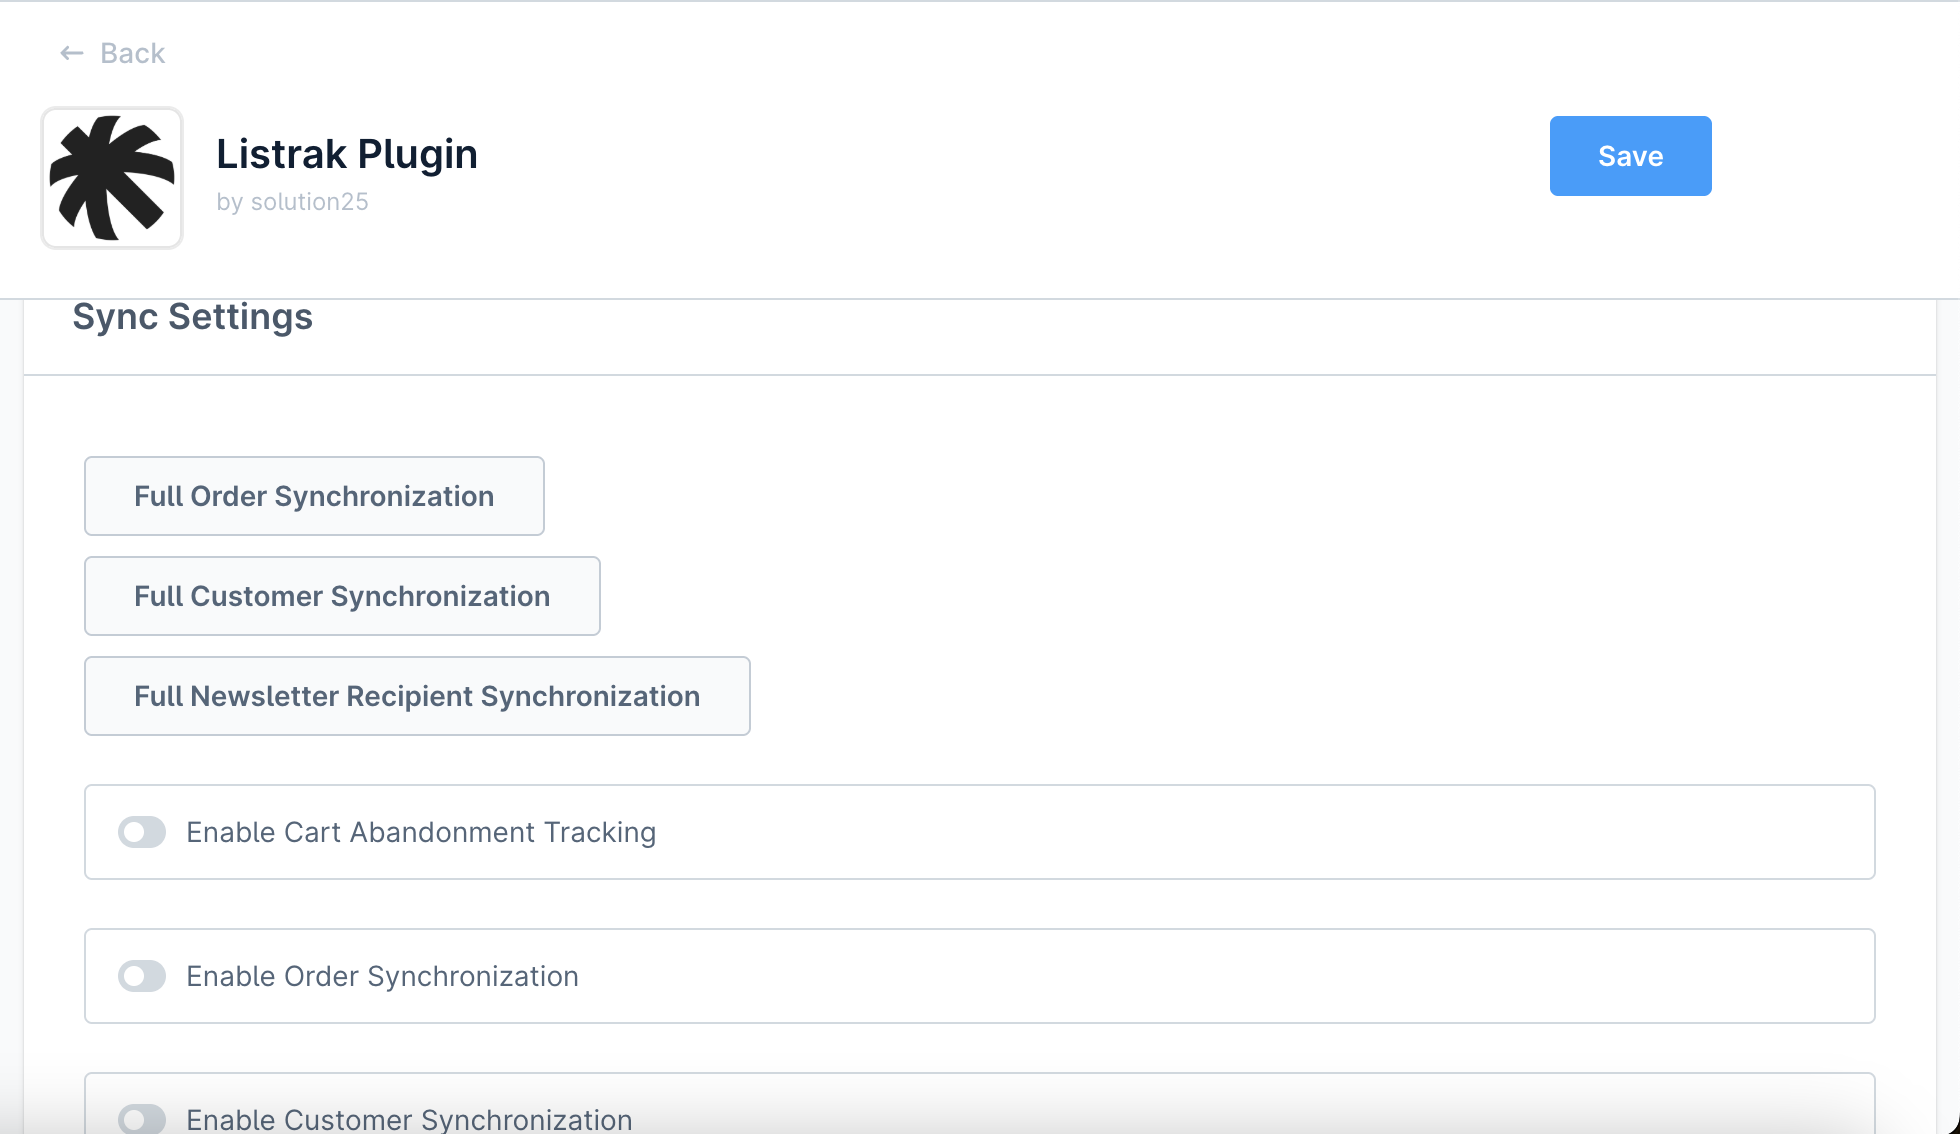
3.Sync Settings

  • Enable Listrak Browser Tracking by clicking on the toggle.

  • Enable Listrak Browser Order Tracking by clicking on the toggle.

  • Enable ongoing Customer Synchronization by clicking on the toggle.

  • Enable ongoing Order Synchronization by clicking on the toggle.

442821910 2d2b9cd1 46dc 4379 Ab76 10bcc0be1993

3.Save Configuration

  • Click Save in the top-right corner to store your settings.

Listrak Plugin - API Documentation

This document describes the custom Admin API endpoints provided by the Listrak Plugin for Shopware 6. These endpoints allow authorized users to trigger full data synchronization tasks between Shopware and the Listrak system.

Data API Connection Test

Endpoint:

POST /api/_action/listrak/data-api/test

Description
Tests the Listrak Data API connection using provided dataClientId and dataClientSecret. Returns a valid access token on success.
Request Headers

Authorization: Bearer 
Content-Type: application/json

Example Request Body
Successful Response

"eyJhbGciOiJIUzI1NiIsInR5cCI6IkpXVCJ9..."

Example Error Response

{
  "errors": [
    {
      "status": "400",
      "detail": "Missing client ID and/or client Secret"
    }
  ]
}

Email API Connection Test

Endpoint

POST /api/_action/listrak/email-api/test

Description
Tests the Listrak Email API connection using provided emailClientId and emailClientSecret. Returns a valid access token on success.
Request Headers

Authorization: Bearer 
Content-Type: application/json

Example Request Body

{
  "Listrak.config.emailClientId": "your-email-client-id",
  "Listrak.config.emailClientSecret": "your-email-client-secret"
}

Successful Response

"eyJhbGciOiJIUzI1NiIsInR5cCI6IkpXVCJ9..."

Example Error Response

{
  "errors": [
    {
      "status": "401",
      "detail": "The provided API credentials are invalid."
    }
  ]
}

How It Works

Shopware Events

The plugin listens to key Shopware events like cart updates, customer registrations, and order placements.

Data sent to Listrak

Data is sent to Listrak automatically via secure API calls, including retries and error logging.

Transactional Mails

Add the Transactional List ID in the plugin configuration settings.
Navigate to the Flow Builder in the Settings section in Shopware admin.
Add a new flow.
Select an event for the trigger.
After selecting the event, select the ‘Send email with Listrak’ action.
442821910 2d2b9cd1 46dc 4379 Ab76 10bcc0be1993 1

vi. In the modal that has opened up, define the Recipient, Transactional Message ID, and any Listrak profile fields needed for the transactional mail.
442821910 2d2b9cd1 46dc 4379 Ab76 10bcc0be1993 2

vii.After making sure that you’ve specified the correct data and Shopware template variables for the transactional mail, click Add Action. You can use Twig syntax in the Field Value cell.
vii.Activate the flow and then save it.

CLI Commands

listrak:sync-products

`
Sync products to Listrak for the specified sales channel.

Arguments:

Name Description
sales-channel-id
Sales channel ID to filter products. (

Option Description
--limit=
Maximum number of products to export.
--local
Generate file locally instead of transferring via FTP.

)

Options:

listrak:sync-orders

Sync orders to Listrak for the specified sales channel.
Arguments:

Name Description
sales-channel-id
Sales channel ID to filter products. (required)

Options:

Option Description
--limit=
Maximum number of orders to export.
--offset=
Starting offset for export (for batching).
listrak:sync-newsletter-recipients

Sync newsletter-recipients to Listrak for the specified sales channel.
Arguments:

Name Description
sales-channel-id
Sales channel ID to filter products. (required)

Options:

Option Description
--limit=
Maximum number of newsletter recipients to export.
--offset=
Starting offset for export (for batching).
listrak:sync-customers

Sync customers to Listrak for the specified sales channel.

Name Description
sales-channel-id
Sales channel ID to filter products. (required)

Options:

Option Description
--limit=
Maximum number of customers to export.
--offset=
Starting offset for export (for batching).

FAQ

Is a Listrak account required?
Yes. You need an active Listrak account, a Data Integration and an Email Integration for syncing data.

What variables can I use in the Transactional Mails flow?

Depending on the type of event, you have access to different variables but some of the most commmon variables include:

order

{{ order.orderNumber }}

{{ order.orderDate|date(‘Y-m-d H:i’) }} (Date needs formatting)

{{ order.currency.isoCode }}

{{ order.lineItems }}

{{ order.deliveries }}

{{ order.transactions }}

{{ order.defaultBillingAddress.firstName }}

{{ order.defaultBillingAddress.lastName}}

{{ order.defaultBillingAddress.street}}

{{ order.defaultBillingAddress.zipcode}}

{{ order.defaultBillingAddress.city}}

{{ order.defaultBillingAddress.phoneNumber}}

etc.

salesChannel
{{ salesChannel.name }}

customer
{{ customer.firstName }}
{{ customer.lastName }}
{{ customer.email }}
etc.

Note: Data such as order line items or order transactions needs to be iterated over via Twig syntax.

Wiki Documentation

Read more about the plugin configuration on our WIKI.

  • Email: info@solution25.com

    US: +1 929-264-76 02

    42nd St Suite 1201, New York, NY 10165

  • © 2026 solution25 - All rights Reserved.

    • Company
      • About Us
      • Events
      • Blog
      • Careers
    • Events
      • Shopware
      • Shopify
      • Integrations
      • Migration
    • Legal
      • Imprint & Legal Information
      • Privacy Policy
    • Social
      • Linkedin
      • Facebook
      • Instagram
    80+ Certificates
    Group
    Group 1
    Group 2